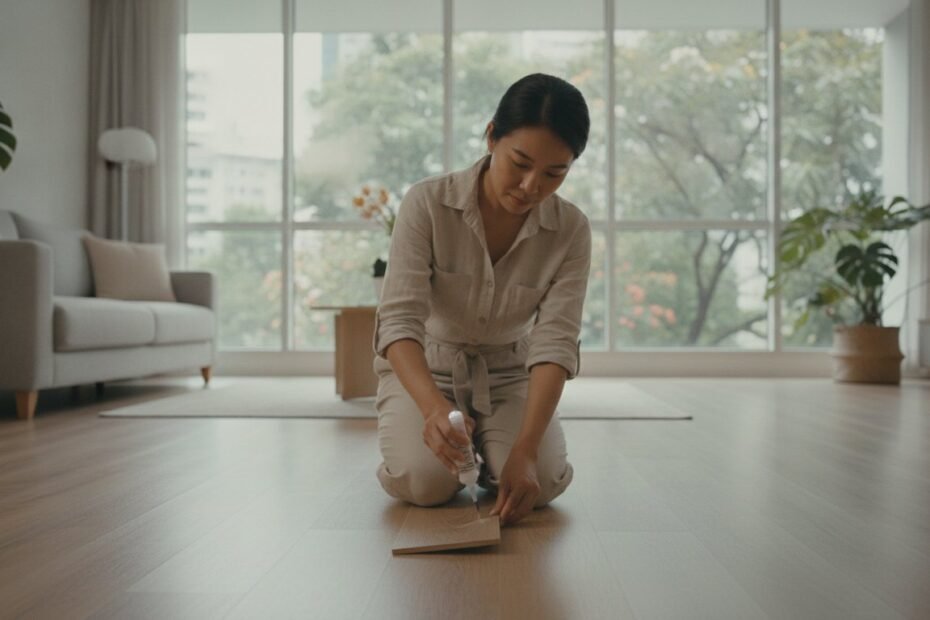
You finally move that heavy teak cabinet to refresh your living room, only to discover a deep, jagged scuff mark staring back at you. It’s a heart-sinking moment for any homeowner who takes pride in their interior design. If you’re noticing gaps between planks or edges that have started to curl due to Singapore’s relentless humidity, you aren’t alone. Learning how to repair vinyl flooring doesn’t have to be a stressful ordeal that risks your HDB renovation warranty or ruins your floor’s aesthetic.
We believe that a beautiful home should be easy to maintain and built to last. You’ve worked hard for your flat, and seeing “popping” tiles or sticky residue can feel like a major setback. This guide will empower you with professional techniques to master the art of fixing scratches, peeling, and buckling in your vinyl floors. We’ll walk you through clear, step-by-step instructions for minor DIY fixes and help you identify the specific signs that require professional intervention from the experienced team at Home Expo Asia.
Key Takeaways
- Identify the difference between simple surface-level wear and structural core damage to determine if your floor is truly repairable.
- Master how to repair vinyl flooring using practical DIY techniques, such as the ‘tennis ball’ trick for scuffs and specialized scratch concealers.
- Learn the proper way to apply moisture-resistant adhesives to fix peeling edges and buckling planks caused by Singapore’s high humidity.
- Understand when to stop a DIY fix and call for professional assistance to protect your HDB renovation warranty and prevent mould growth.
- Discover the ‘Three-Mat’ system and other expert maintenance tips to shield your vinyl floors from future grit, moisture, and furniture damage.
Assessing the Damage: Is Your Vinyl Floor Repairable?
Before you grab a toolkit and search for how to repair vinyl flooring, you must determine if the damage is skin-deep or a sign of systemic failure. High-quality vinyl planks consist of a core, a decorative photographic film, and a clear wear layer. If the damage stays within that clear top coat, a DIY fix is usually straightforward. However, once the decorative film is compromised, the repair becomes significantly more complex. You aren’t just fixing an aesthetic flaw; you’re restoring a moisture barrier.
This wear layer is your first line of defense. It protects the realistic wood or stone prints that make your floors look great. While sheet vinyl flooring and luxury vinyl planks differ in thickness and composition, both rely on this protective shield for durability. If you see widespread delamination where the layers are physically separating across multiple planks, your floor has likely reached its end-of-life phase. In these cases, individual repairs are often just temporary bandages for a larger problem.
In Singapore, our tropical humidity levels often hover around 80%. This moisture can easily get trapped behind “repaired” planks if the subfloor wasn’t properly dried before you applied new adhesive. This is a common pitfall for homeowners. A simple patch job might look perfect on the surface, but it could be hiding subfloor moisture issues that eventually lead to mould growth or “popping” tiles.
Surface Scratches vs. Deep Gouges
Determining the severity of a scratch is easy with the fingernail test. Simply run your nail across the mark. If it glides over without catching, it’s a surface scuff that you can likely buff out. A gouge is damage that penetrates through the decorative film layer and into the core. These deep wounds are dangerous because they allow water from routine mopping to seep into the plank’s heart. This often causes the material to swell and warp, making a simple repair impossible later on.
Peeling, Gapping, and Buckling
Singaporean homes often experience “cupping,” where the edges of the plank curve upwards, or “crowning,” where the centre of the plank bulges. These issues are usually climate-related. Gaps often appear during the drier, air-conditioned months when the material contracts slightly. If your floor was installed without a proper expansion gap around the perimeter, the planks have no room to move as temperatures shift. This lack of space is the primary reason for floor “popping” or buckling, which usually requires professional refitting rather than a quick DIY glue-down.
DIY Fixes for Minor Surface Scratches and Scuffs
Before you begin researching how to repair vinyl flooring, you must prepare the surface correctly. Dirt and grit act like sandpaper under your tools. A clean workspace is the difference between a invisible fix and a messy patch. Start by sweeping the area thoroughly. Use a pH-neutral cleaning solution to remove any oils or grime. If you use a cleaner that’s too acidic or alkaline, you risk stripping the wear layer you’re trying to save. Once the area is dry, you can accurately judge the depth of the damage.
Light abrasions often only affect the very top of the wear layer. For these, a specialized vinyl floor sealer or scratch concealer works wonders. These products are designed to flow into the microscopic grooves of a scratch and harden. This process mimics the light-reflective properties of the surrounding floor. For deeper marks that haven’t quite reached the decorative film, wax sticks or color-match pens are excellent tools. They allow you to build up the surface and blend the repair with the floor’s natural grain. Understanding how to repair vinyl flooring at home saves you both time and money on minor accidents.
The Tennis Ball and Jojoba Oil Hacks
Rubber scuff marks from shoes or furniture are common in busy Singaporean households. It’s a simple fix. Take a clean tennis ball and cut a small “X” into it. Place it on the end of a broom handle and rub the scuff mark firmly. The texture of the tennis ball lifts the rubber without the need for harsh chemicals. If the mark is stubborn, a tiny drop of jojoba oil can help. Jojoba oil is a natural ester that is remarkably safe for vinyl. It provides lubrication without the risk of degrading the material, which often happens with petroleum-based lubricants. Always wipe the area with a damp cloth afterward. This prevents the spot from becoming a slip hazard for your family.
Using Vinyl Repair Kits and Fillers
For scratches that are felt with a fingernail, you’ll need a bit more substance. Choosing the right putty or filler for vinyl flooring singapore is vital for a long-lasting result. Select a kit that offers multiple colors so you can custom-blend the shade. Apply a small amount of filler to the scratch. Use a plastic putty knife to level it off. Plastic is essential here; a metal knife can create new scratches. Work the filler into the gap and scrape away the excess until it’s flush with the plank. Patience is your best asset during this stage. Most fillers require at least 24 hours to cure completely. Keep foot traffic away from the area during this window to ensure the bond remains strong. If the damage feels too extensive for a simple kit, reaching out for professional installation support can help restore your floor’s integrity.
Advanced Repairs: Fixing Peeling Edges and Buckling Planks
When your floor starts lifting at the corners or showing visible waves, you’ve moved beyond simple surface maintenance. These structural issues often stem from adhesive failure or thermal expansion. In Singapore’s humid environment, moisture can degrade standard glues over time. Knowing how to repair vinyl flooring when it begins to peel or buckle is essential to preventing a small trip hazard from turning into a full floor replacement. To achieve a professional-grade repair, you must follow a methodical approach that prioritizes a clean bond and moisture management.
Follow these five steps for a successful structural fix:
- Step 1: Gently lift the affected area and clean the exposed subfloor and the underside of the vinyl. Any leftover dust or old glue will prevent the new bond from holding.
- Step 2: Apply a high-quality, moisture-resistant vinyl adhesive. Avoid generic hardware store glues that aren’t rated for high-humidity environments.
- Step 3: Use a hand roller to press the plank down firmly. This ensures 100% contact between the surfaces and removes any trapped air bubbles.
- Step 4: Weigh down the plank using heavy books or a weighted bucket. Keep this pressure applied for at least 12 hours to let the adhesive set correctly.
- Step 5: Clean off any excess adhesive that squeezes out from the edges immediately with a damp cloth. Once it dries, it’s much harder to remove without damaging the finish.
Re-sealing Peeling Edges
It’s tempting to reach for standard “super glue” for a quick fix, but this is a mistake. Super glue becomes brittle once it cures. Vinyl needs to remain flexible to handle temperature changes. Instead, use a pressure-sensitive adhesive designed for luxury vinyl. If you’re dealing with old, stubborn glue residue, use a hairdryer on a low heat setting. This makes the old adhesive pliable and much easier to scrape away without warping the plank.
Addressing Gaps and ‘Creeping’ Planks
Gaps between planks often occur when the floor shifts over time. You can often “close” these gaps in click-lock floors by using a glass suction cup and a rubber mallet. Attach the suction cup to the plank and tap it gently toward the gap. However, it’s vital to check your perimeter expansion gaps first. Gaps are often a symptom of inadequate perimeter spacing, as the floor has no room to breathe and begins to pull apart internally.
Fixing Buckled or ‘Popping’ Sections
Buckling is usually a sign that your floor is too tight against the walls or that subfloor moisture is pushing the planks upward. If the floor is “popping” because it’s too tight, you might need to trim a few millimetres off the edge of the plank nearest the wall to relieve the pressure. This allows the floor to lay flat again. If the buckling is widespread or the subfloor feels damp, it’s time for a professional flooring singapore assessment. Our team can help determine if the issue is a simple fix or a sign that your home requires a more robust moisture barrier installation.
When to Call the Professionals: Repair vs. Replacement
While minor scuffs are easy to handle, some floor issues signal deeper structural problems. You might feel confident researching how to repair vinyl flooring on your own, but certain situations require a professional touch to ensure your home remains safe and compliant. In Singapore’s tropical climate, a poorly executed DIY repair can trap moisture between the vinyl and the subfloor. This creates a breeding ground for mould that can spread undetected beneath your feet, eventually requiring a total floor overhaul that costs significantly more than a simple professional patch.
Warranty coverage is another critical factor to consider. Most manufacturers in Singapore are very specific about structural repairs. If you attempt to lift and re-glue large sections of your floor using unapproved adhesives, you could void your entire product warranty. This leaves you unprotected against future manufacturing defects. Additionally, matching the aesthetic of your current floor is a major hurdle. Vinyl patterns are often updated every few years. Unless you have spare planks from your original installation batch, finding a perfect match for a 5-year-old floor is nearly impossible for a homeowner. Our team at Home Expo Asia maintains an extensive inventory of over 200 designs to help bridge these gaps.
Safety must always come first. If your vinyl is lifting because the underlying cement screed is cracking or the subfloor has become uneven, a surface-level fix won’t work. Since June 2015, HDB has mandated the use of pre-packed screed for dry areas to ensure quality and durability. If you suspect your subfloor is failing, a professional assessment is mandatory to avoid non-compliance fines of up to S$5,000 and the potential for structural instability in your renovation.
The Complexity of Click-Lock Replacement
Replacing a single damaged plank in the middle of a room is one of the hardest DIY tasks. Because click-lock systems are interconnected, you often have to “unzip” the floor from the nearest wall all the way to the damage. This risks breaking the delicate tongues and grooves of perfectly good planks. Professional installers use a specialized “cut-out” technique. We carefully remove the damaged piece and create a custom-fitted replacement that is seamlessly integrated into the existing layout. This specific repair requires precision tools and is best left to Home Expo Asia’s expert installers to ensure a flush finish.
HDB Guidelines and Renovation Compliance
Maintaining your floor isn’t just about looks; it’s about protecting your investment. For new HDB flats, you are responsible for ensuring all renovation works comply with current guidelines. If you perform major structural repairs yourself without proper documentation, it could raise red flags during a resale inspection. Having professional documentation of your repairs provides peace of mind and protects your home’s market value. If you’re unsure about the state of your flooring, it’s better to be safe than sorry. Consult Home Expo Asia for a professional floor assessment today to keep your home in top condition.
Preventing Future Damage: Expert Maintenance Tips
The best way to manage how to repair vinyl flooring is to ensure you rarely have to do it. Once you’ve restored your floor’s beauty, shifting your focus to proactive protection will save you significant time and money. Prevention starts with your furniture. Always install high-quality felt pads on every chair, table, and cabinet leg. You must avoid plastic or rubber glides. Rubber contains antioxidants that can cause a permanent chemical reaction with vinyl, leading to stubborn yellow stains that no cleaner can remove. Replacing these pads every six months ensures they don’t trap grit that acts like sandpaper against your wear layer.
Singapore’s environment poses unique challenges for floor longevity. We recommend the “Three-Mat” system at all entryways to trap grit and moisture before it reaches your living area. Place a coarse “scraper” mat outside your door, an absorbent mat just inside, and a microfiber runner in the hallway. This setup catches nearly 80% of the debris that typically causes surface abrasions. Additionally, try to maintain consistent indoor humidity levels. While our tropical air is naturally damp, heavy air-conditioning use can cause planks to contract. Keeping your home at a stable temperature minimizes the stress on click-lock joints. For high-traffic areas, choosing a premium herringbone flooring with a thicker wear layer provides extra durability against daily wear and tear.
Managing Sunlight and UV Exposure
Direct sunlight is a silent enemy of vinyl. Intense UV rays can “dry out” the material, making the top layers brittle and prone to cracking or peeling over time. In many Singaporean condos and HDB flats with large windows, this exposure is constant. Use blinds or UV-filtering window films to shield your flooring investment during peak daylight hours. If you use area rugs, rotate them every few months. This prevents uneven “fading” patterns where the exposed floor lightens while the covered section retains its original hue.
Safe Cleaning Practices
Your cleaning routine can either preserve or destroy your floor. Steam mops are frequently marketed as deep-cleaning tools, but they are the primary cause of “repairable” vinyl becoming “unrepairable.” The high-pressure steam forces moisture into the seams and can melt the adhesive or warp the core. Stick to a damp microfiber mop and a pH-neutral cleaner. These solutions effectively lift dirt without stripping the protective wear layer or leaving a dulling residue. Ultimately, the most effective prevention is a high-quality start. Professional installation by the Home Expo Asia team ensures your floor is laid with the correct expansion gaps and subfloor preparation, making it truly built to last. Knowing how to repair vinyl flooring is a great skill, but a well-maintained floor is a much better asset for your home.
Restore Your Home’s Foundation with Confidence
Mastering how to repair vinyl flooring is about more than just aesthetics; it’s about safeguarding your property’s long-term value. You’ve learned how to distinguish between surface abrasions and structural failures that threaten your HDB renovation warranty. By using the right pH-neutral cleaners and proactive prevention like felt pads, you can extend the life of your floors by years. These small habits prevent minor scuffs from becoming costly replacements.
When DIY fixes aren’t enough, our expert Singapore-based installation team is ready to step in. We offer over 200 premium designs for easy matching and provide a comprehensive warranty on all new installations to ensure your peace of mind. We specialize in addressing complex issues like popping tiles and subfloor moisture that typical DIY kits can’t reach. Trusting an experienced professional ensures your renovation remains compliant and durable.
Get a Free Site Assessment for Your Vinyl Floor Repair or Replacement today. Your home deserves a flawless finish that stands up to the test of time. Take the first step toward a beautiful, worry-free floor now.
Frequently Asked Questions
Can I use wood filler to fix a hole in my vinyl flooring?
No, you shouldn’t use wood filler for vinyl repairs. Wood filler is designed to be rigid and does not bond well with synthetic materials. Since vinyl planks naturally expand and contract with temperature changes, wood filler will eventually crack and pop out. Instead, use a flexible vinyl-specific putty or a repair kit designed to move with the floor’s surface while maintaining a waterproof seal.
How do I fix a tear in my sheet vinyl floor?
To fix a tear, start by cleaning the subfloor beneath the damaged area to remove dust. Carefully apply a thin layer of vinyl adhesive under the edges of the tear and press the material back into place. Use a hand roller to ensure a flat bond and wipe away any excess glue immediately. Finally, apply a specialized seam sealer to the edges to prevent moisture from entering the gap.
Why is my vinyl flooring popping up in the corners?
Corners usually pop up due to adhesive failure or a lack of expansion gaps at the room’s perimeter. In Singapore’s humid climate, moisture can weaken the bond if the subfloor wasn’t properly sealed. If the planks are too tight against the walls, they have no room to breathe and will lift at the corners. Trimming the edges near the wall often solves this pressure issue.
Is it safe to use super glue on vinyl floor edges?
No, super glue is not a safe choice for vinyl. It cures into a very hard, brittle plastic that cannot handle the natural flexibility of your flooring. Over time, foot traffic will cause the brittle bond to shatter, leaving behind a messy residue that is difficult to remove. For a professional result, always use a moisture-resistant, pressure-sensitive adhesive that stays flexible after it sets.
How do I remove deep scratches from my vinyl floor?
Deep scratches that have reached the decorative film require a color-matched wax stick or a specialized repair pen. Clean the scratch with a pH-neutral solution first to ensure the filler bonds correctly. Fill the mark and level the surface with a plastic putty knife to avoid creating new abrasions. Learning how to repair vinyl flooring with these tools can hide even significant gouges without requiring a full plank replacement.
Can I replace just one vinyl plank without taking up the whole floor?
Yes, it’s possible to replace a single plank, but it requires a steady hand. You must carefully cut out the damaged piece and remove the locking tongues from a new replacement plank. Apply adhesive to the subfloor and drop the new piece into the gap. While this is a common way how to repair vinyl flooring, many homeowners prefer professional help to ensure the new plank sits perfectly flush with the rest of the floor.
Why are there gaps appearing between my vinyl planks?
Gaps typically appear when the flooring contracts during drier, air-conditioned periods or if the planks were not securely locked during installation. If your floor has shifted, you can often use a glass suction cup and a rubber mallet to tap the planks back together. If gaps persist across the entire room, it might indicate that the subfloor is uneven or that the expansion gaps at the walls are too large.
Does a steam mop help repair floor buckling?
No, a steam mop will actually make buckling much worse. The high-temperature steam forces moisture into the joints and can cause the layers of the vinyl to delaminate or peel. If your floor is buckling, you need to identify the source of subfloor moisture or check if the expansion gaps are blocked. Using a steam mop on a buckled floor will likely turn a repairable issue into a permanent failure.